
Launching WordPress on cloud infrastructure may sound intimidating — but once you understand the process, it becomes one of the most powerful skills you can develop as a website owner or startup founder.
In this guide, you will learn exactly how to deploy WordPress on Amazon EC2, configure the server, secure the database, fix common errors, and prepare your site for production.
By the end, you will have your own self-hosted cloud server, not shared hosting.
🌐 What is AWS EC2?


Amazon EC2 (Elastic Compute Cloud) is a service that lets you rent virtual servers in the cloud.
Instead of paying a hosting company, you control your own machine.
✅ Why startups love EC2:
- Full control over server
- Easily scalable
- Pay only for what you use
- Enterprise-grade infrastructure
- Ideal for WordPress, SaaS apps, and APIs
🧠 Who Should Use EC2 for WordPress?
EC2 is perfect if you:
✅ Want better performance than shared hosting
✅ Expect future growth
✅ Are building a startup
✅ Want DevOps-level skills
✅ Prefer full control
If you want something simpler — AWS Lightsail is easier.
But if you want real infrastructure knowledge, EC2 is unmatched.
✅ Step 1 — Launch an EC2 Instance
Choose:
- OS: Ubuntu 24.04 LTS
- Instance: t3.micro (great for beginners)
- Storage: Minimum 20–30 GB
- Region: Choose closest to your audience
🔐 Step 2 — Configure Security Group


Allow these ports:
| Port | Purpose |
|---|---|
| 22 | SSH access |
| 80 | HTTP |
| 443 | HTTPS |
⚠️ Without port 80, your website will not load.
🧱 Step 3 — Connect to Your Server
Use SSH:
ssh ubuntu@YOUR_PUBLIC_IP
Update packages:
sudo apt update
sudo apt upgrade -y
Always start with updates.
💾 Step 4 — Expand Storage (Highly Recommended)
Many beginners forget this.
Default disk is often too small.
Check disk:
df -h
If needed, expand via AWS console and run:
sudo growpart /dev/nvme0n1 1
sudo resize2fs /dev/nvme0n1p1
Now your server has breathing room.
⚡ Step 5 — Add Swap Memory (Prevents Crashes)
Small servers can run out of RAM.
Create swap:
sudo fallocate -l 1G /swapfile
sudo chmod 600 /swapfile
sudo mkswap /swapfile
sudo swapon /swapfile
Check:
free -h
Swap acts as emergency memory.
Huge stability improvement.
🌍 Step 6 — Install Nginx
sudo apt install nginx -y
sudo systemctl start nginx
sudo systemctl enable nginx
Visit your IP.
If you see the default Nginx page — success.
🐘 Step 7 — Install PHP
sudo apt install php-fpm php-mysql php-cli php-curl php-xml php-mbstring php-zip php-intl -y
Check version:
php -v
🗄️ Step 8 — Install MariaDB
sudo apt install mariadb-server -y
sudo systemctl start mariadb
Secure it:
sudo mysql_secure_installation
Set a strong root password.
🔑 Step 9 — Create WordPress Database
Login:
sudo mysql -u root -p
Create DB:
CREATE DATABASE wordpress DEFAULT CHARACTER SET utf8mb4 COLLATE utf8mb4_unicode_ci;
Create user:
CREATE USER 'wpuser'@'localhost' IDENTIFIED BY 'StrongPassword!';
GRANT ALL PRIVILEGES ON wordpress.* TO 'wpuser'@'localhost';
FLUSH PRIVILEGES;
EXIT;
⚠️ Never use root for WordPress.
📦 Step 10 — Install WordPress
cd /var/www/html
sudo wget https://wordpress.org/latest.tar.gz
sudo tar -xvzf latest.tar.gz
sudo mv wordpress/* .
sudo chown -R www-data:www-data /var/www/html
🔌 Step 11 — Connect Nginx to PHP (CRITICAL)
Open config:
sudo nano /etc/nginx/sites-available/default
Ensure:
index index.php index.html;
And:
fastcgi_pass unix:/run/php/php-fpm.sock;
⚠️ Socket mismatches cause 502 errors — a very common mistake.
Test:
sudo nginx -t
sudo systemctl reload nginx
🎉 Step 12 — Launch WordPress Installer
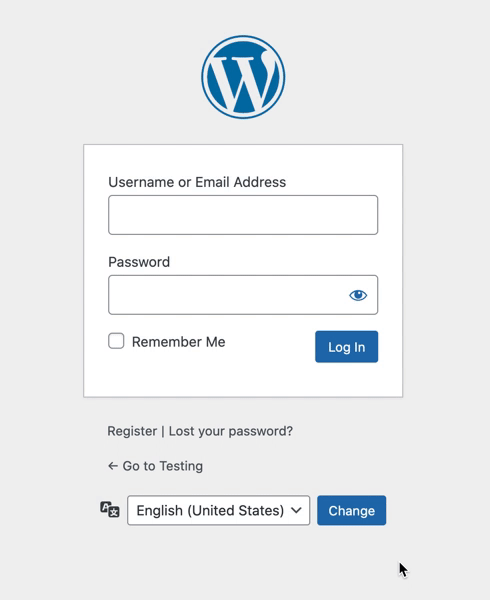

Visit:
http://YOUR_IP
Enter:
- Database:
wordpress - User:
wpuser - Password: your DB password
- Host:
localhost
Click Run Installation.
Congratulations — your cloud server is now hosting WordPress.
❗ Common Errors (And Instant Fixes)
✅ 403 Forbidden
Cause: Wrong permissions
Fix:
sudo chown -R www-data:www-data /var/www/html
sudo chmod -R 755 /var/www/html
✅ 502 Bad Gateway
Cause: PHP socket mismatch
Check:
ls /run/php/
Match it in nginx config.
✅ Database Connection Error
Test manually:
mysql -u wpuser -p -h localhost wordpress
If login works → WordPress will work.
Professional debugging rule.
🔐 MUST-DO Security Steps After Install
Install Firewall
sudo ufw allow OpenSSH
sudo ufw allow 'Nginx Full'
sudo ufw enable
Install Fail2Ban
Blocks brute-force attackers.
sudo apt install fail2ban -y
Disable Root SSH
Edit:
sudo nano /etc/ssh/sshd_config
Set:
PermitRootLogin no
Restart SSH.
Massive security upgrade.
🔒 Install FREE SSL (Highly Recommended)
sudo apt install certbot python3-certbot-nginx -y
sudo certbot --nginx
Choose redirect.
Now your site runs on HTTPS.
Google prefers this.
💡 How Much Traffic Can a t3.micro Handle?
With caching:
👉 10k–20k monthly visitors easily.
Without optimization:
👉 ~3k–5k.
For WooCommerce, consider upgrading later.
🧠 Pro Tips Most Tutorials Don’t Tell You
⭐ Always test DB from CLI
Removes guessing.
⭐ Add swap
Prevents crashes.
⭐ Expand disk early
Scaling later is harder.
⭐ Use non-root DB users
Better security.
🚀 Final Thoughts
By launching WordPress on EC2, you didn’t just install a CMS.
You learned:
✅ Cloud infrastructure
✅ Linux basics
✅ Web server configuration
✅ Database security
✅ Debugging
✅ DevOps fundamentals
These skills separate casual website owners from serious builders.
And once you understand this stack…
You can deploy almost anything.
💡 Don’t Hesitate to Use AI When You Get Stuck
While setting up a cloud server, it is completely normal to encounter unexpected errors — from permission issues and database connection failures to web server misconfigurations. Instead of spending hours searching through scattered forum posts, consider using an AI assistant such as ChatGPT to troubleshoot problems in real time. By simply pasting error messages or describing the issue, you can receive step-by-step guidance tailored to your situation. This approach dramatically shortens the learning curve, reduces frustration, and helps you understand why something broke — not just how to fix it. Think of AI as your on-demand technical companion: whether you are a beginner launching your first server or an experienced builder diagnosing a complex bug, leveraging AI can turn roadblocks into powerful learning moments and keep your project moving forward with confidence.
Happy building 🚀
Discover more from Webnzee
Subscribe to get the latest posts sent to your email.

Leave a Reply